Vacuum sealing liquids can be clean and effective when you freeze them slightly first, use sturdy, liquid-compatible bags or containers, and leave enough headspace to prevent spills. Carefully operate your vacuum sealer to avoid disturbing the liquid and guarantee the seal is secure. Proper preparation, like freezing and choosing the right containers, makes the process mess-free and preserves flavor. Keep your skills sharp—exploring more tips can help you master this practical method with ease.
Key Takeaways
- Partially freeze liquids to prevent leaks and ensure they stay firm during vacuum sealing.
- Use specialized bags or containers designed for liquids with secure, airtight seals.
- Leave adequate headspace to accommodate expansion and avoid spills during sealing.
- Select vacuum sealers with liquid-specific settings or pulse functions for better control.
- Check seals regularly and avoid overfilling to maintain cleanliness and prevent messes.
Vakumar Vacuum Sealer Machine, 90Kpa Liquid Food Vacuum Sealer Machine Preservation Dry/Moist/Liquid Modes, LED Indicator Light, Handle Locked Design, Built-in Cutter and Bag Storage, Starter Kit
【10 Modes &Variable Modes】-Unique liquid sealing mode -Effectively vacuum seals any liquid or liquid-rich food such as soups,…
As an affiliate, we earn on qualifying purchases.
As an affiliate, we earn on qualifying purchases.
How Does Vacuum Sealing Liquids Work?
How Does Vacuum Sealing Liquids Work?
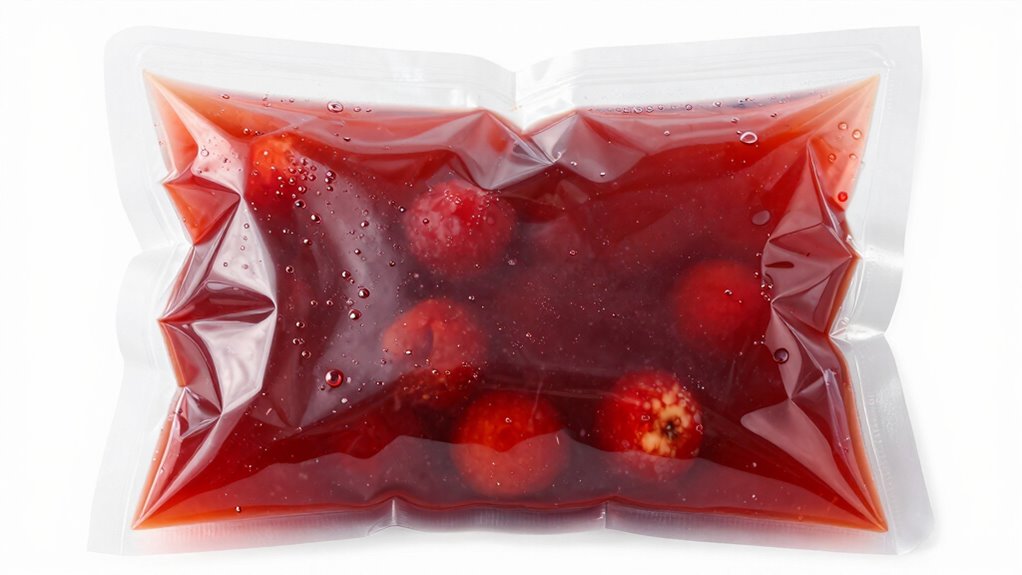
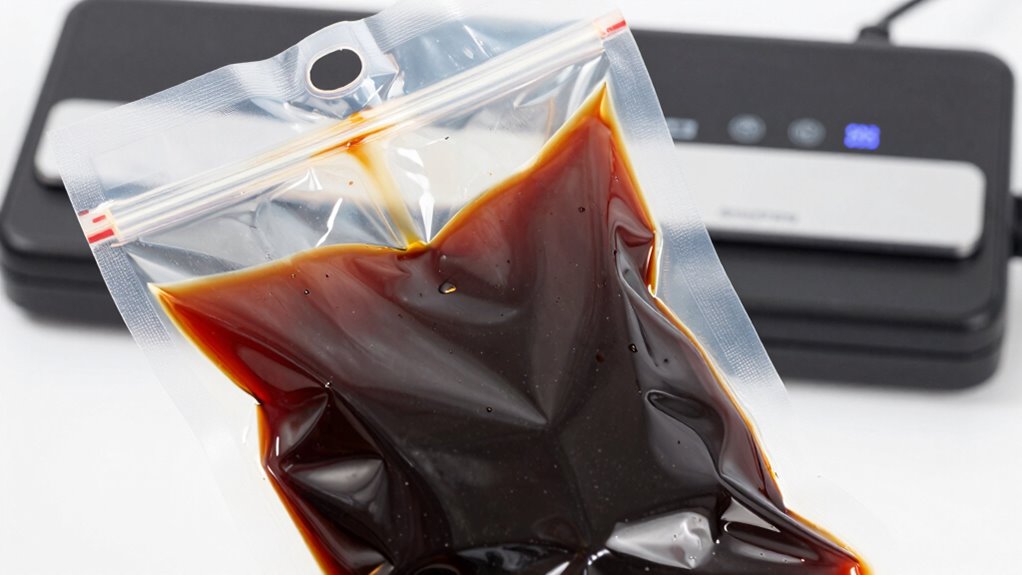
Vacuum sealing liquids can be tricky because liquids tend to be drawn into the vacuum sealer’s pump or escape the bag during the process. To prevent this, you can partially freeze the liquids first, making them firm enough to contain while sealing. This method helps with liquid preservation and guarantees the bag stays airtight. When you seal, the vacuum removes air around the frozen liquid, creating a tight seal that keeps the contents fresh. Vacuum sealing liquids also offers the benefit of flavor infusion, as the process locks in seasonings or marinades. By controlling the temperature and sealing carefully, you prevent leaks and maintain the quality of your liquids. This technique makes it easier to store soups, sauces, or marinades without mess or spoilage. Additionally, using HEPA filters in your vacuum sealer can help improve air quality and maintain the efficiency of your appliance. Furthermore, understanding digital content strategies can enhance your approach to preserving various food items through innovative methods. Moreover, the ability to extend the storage life of sealed liquids is crucial for maintaining freshness and reducing food waste, especially when considering ethical consumerism in food preservation practices. Engaging in seasonal preservation techniques can also optimize the quality of your liquid foods throughout the year.

Liquid Block Vacuum Sealer Bags
Includes (25) pre-cut 11" x 14" gallon-sized bags for high-capacity food storage
As an affiliate, we earn on qualifying purchases.
As an affiliate, we earn on qualifying purchases.
Choosing the Best Vacuum Sealer and Containers for Liquids
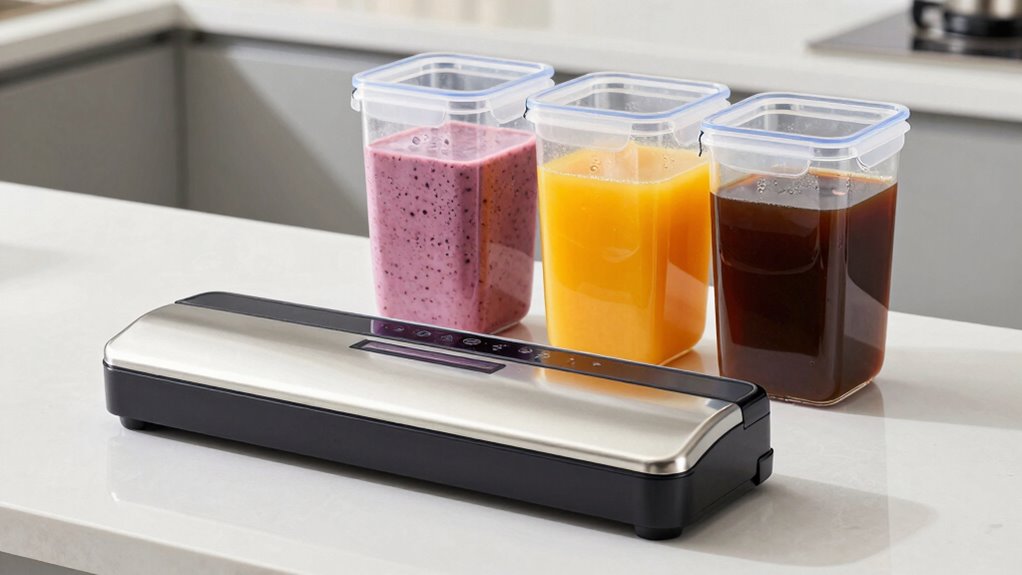
To get the best results, you need a vacuum sealer compatible with liquids, so check if it’s designed to handle moisture without leaks. Choosing the right containers, like specially designed bags or jars, also helps prevent spills and preserve freshness. By considering these factors, you’ll guarantee your liquids stay sealed securely and maintain their quality. Additionally, understanding burnout prevention can enhance your overall efficiency in the kitchen. Exploring regional flavors can also inspire you to experiment with new liquid pairings that elevate your culinary creations. The evolution of women’s golf has also seen significant advancements, paralleling the innovation in kitchen technology.
Sealer Compatibility With Liquids
Choosing the right vacuum sealer and containers for liquids requires careful attention to their compatibility. Not all sealers handle liquids well, so look for models designed specifically for this purpose. A sealer with a strong vacuum pump helps prevent leaks and preserves flavor by minimizing air exposure. Some sealers feature specialized settings for liquids or pulse modes, which are essential for maintaining flavor preservation during sealing. Make certain your sealer can create a tight, secure seal to avoid spills, especially when doing liquid infusions or storing soups and broths. Using the right equipment reduces messes and guarantees your liquids stay fresh longer. Check manufacturer recommendations to confirm that your sealer is compatible with liquids, giving you peace of mind and better results every time. Additionally, color accuracy is crucial in ensuring that the stored liquids maintain their vibrant appearance and appeal, especially for infusions. Moreover, focusing on user experience during the sealing process can enhance the effectiveness of your vacuum sealing efforts.
Optimal Container Options
Selecting the right containers is key to guaranteeing liquids stay fresh and leak-free after sealing. You want containers with high container durability, so they withstand the vacuum process without cracking or deforming. Look for options made from materials compatible with vacuum sealers, such as BPA-free plastic or silicone, to prevent chemical reactions or degradation. Rigid, sturdy containers with airtight seals help maintain freshness and prevent leaks during storage and handling. Consider specialized vacuum bags or jars designed for liquids, as they often feature reinforced edges and secure locking mechanisms. Avoid flimsy or thin-walled containers, which can collapse or break under vacuum pressure. Choosing the best container options ensures your liquids stay fresh, secure, and easy to store without messes.

Tightvac 1 oz to 6 ounce – Patented Airtight Container | Multi-use Vacuum Container Works as Smell Proof Containers for Herbs and Dry Goods. Black Cap and Clear Body
Holds 6 oz. Coffee, Tea or Trail Mix, 16 oz C & H Sugar , Perfect 1 oz….
As an affiliate, we earn on qualifying purchases.
As an affiliate, we earn on qualifying purchases.
Tips for Preparing Liquids to Seal Without Spills
To prevent spills when vacuum sealing liquids, start by choosing a container that’s just the right size for your amount. Freezing the liquid slightly helps it stay put during sealing, and leaving some headspace allows for expansion. These simple steps make the process cleaner and more successful. Additionally, consider pet microchipping as a method to ensure safety during unexpected events, much like being prepared for spills in the kitchen. Using a small wood stove can also provide efficient heating while you manage your kitchen tasks. Understanding personality traits can further enhance your approach to kitchen organization and efficiency. Incorporating smart appliances can automate tasks and streamline your kitchen workflow, making the entire process even more efficient. Choosing the right tip size can improve results when using spray equipment in other kitchen projects.
Use Proper Container Size
Using the right container size is essential to prevent spills when sealing liquids. Oversized containers can cause overflow, while too-small ones risk breaking or ineffective sealing. Choose containers with good container durability to withstand vacuum pressure and avoid leaks. Properly fitted lids ensure a tight seal, improving sealing techniques and preventing spills. Always leave enough headspace for liquids to expand without overflowing during vacuuming. Selecting the correct size minimizes the risk of accidental spills and damage. Additionally, remember that water damage can occur if containers leak during the sealing process. Maintaining indoor air quality is also important, as any leaks can introduce unwanted moisture into your environment. Understanding relationship dynamics can also help you manage stress if spills occur.
- Opt for containers with sturdy, durable material
- Use containers with slightly larger capacity than the liquid volume
- Verify lids fit snugly for an airtight seal
- Avoid overfilling to allow for expansion during vacuuming
Additionally, ensuring that your containers are properly fitted lids can significantly enhance the effectiveness of your vacuum sealing process. A well-prepared approach to vacuum sealing emphasizes effective management of liquid contents to ensure optimal results.
Freeze Liquids First
Have you ever experienced spills when sealing liquids? Freezing them first helps prevent messes and makes sealing easier. When liquids freeze, they become less likely to spill or leak during vacuuming, ensuring a clean process. Plus, freezing can enhance flavor infusion, as it slows evaporation and preserves delicate tastes. For liquid preservation, this step also minimizes air exposure, keeping flavors fresh longer.
| Tip | Benefit |
|---|---|
| Freeze in small portions | Prevents spills during sealing |
| Use a sturdy container | Maintains shape during freezing |
| Slightly underfill before freezing | Allows expansion without spills |
Leave Headspace for Expansion
After freezing your liquids to prevent spills, it’s important to leave some headspace in your container before sealing. This space allows for expansion as the liquid slightly warms or if it releases gases. Proper air removal is vital because trapped air can cause spills or interfere with vacuum sealing. Use flexible containers, which expand slightly during the sealing process, helping to accommodate this expansion comfortably.
- Leave about 1 inch of headspace to prevent overflows
- Use containers with flexible walls for easier expansion
- Carefully remove as much air as possible before sealing
- Avoid overfilling, which increases the risk of spills during vacuuming
Following these tips ensures a cleaner process and prevents messes while maintaining quality. Additionally, check the store return policies of your containers to ensure you can return any that don’t meet your needs.
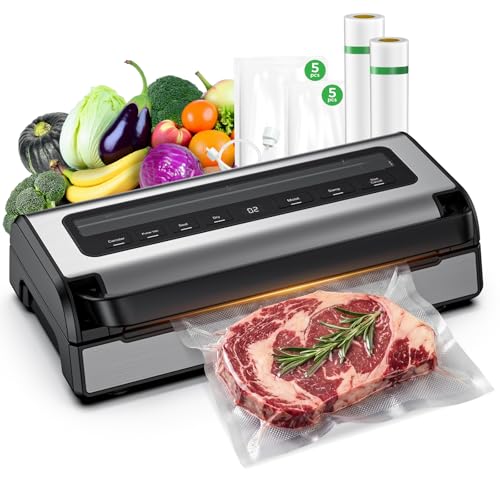
Vacuum Sealer for Food, Complete Starter Kit Includes 2 Rolls & 10 Bags, All-in-One Automatic Food Sealer machine with Built-in Cutter & Bag Storage, Powerful Motor for Dry/Moist/Canister Sealing
All-in-One Modes for Any Food: Choose from Seal, Moist, Damp, Dry, Pulse Vac, and Canister modes. Perfectly preserve…
As an affiliate, we earn on qualifying purchases.
As an affiliate, we earn on qualifying purchases.
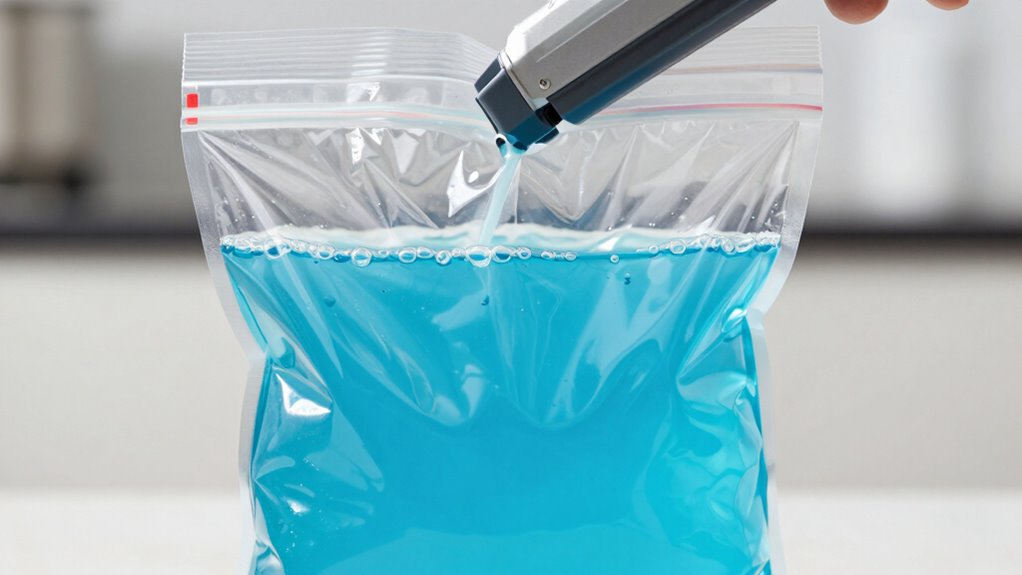
Step-by-Step: How to Vacuum Seal Liquids Without Mess

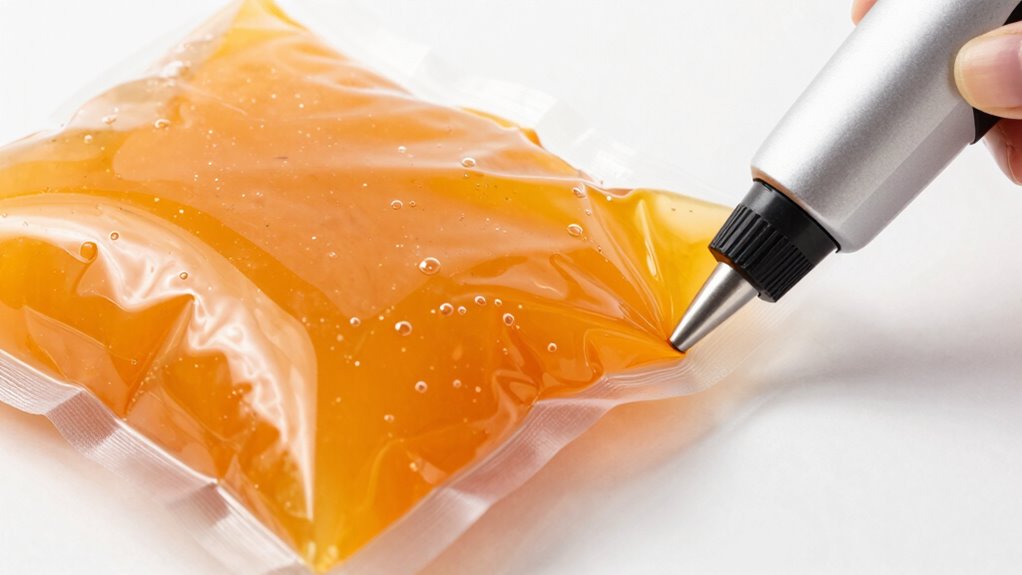
Vacuum sealing liquids can be tricky because of the risk of spills and messes, but with the right technique, you can do it cleanly and efficiently. Start by freezing the liquid slightly until it’s semi-solid—this helps prevent it from being drawn into the vacuum sealer. Use a specialized bag or a jar with a sealing lid designed for liquids. When sealing, keep the opening above the liquid level and avoid overfilling. Allow enough space for expansion, especially if freezing isn’t an option. This method preserves flavor and nutrients by minimizing exposure to air, which is crucial for maintaining high-quality ingredients. Carefully operate the vacuum sealer to extract air without disturbing the liquid, ensuring a tight seal. With practice, you’ll master a mess-free process that maintains the quality of your liquids. Additionally, using accurate measurement tools can help you determine the right liquid consistency before sealing, ensuring optimal results.
What Are the Best Bags and Containers for Sealing Liquids?

Choosing the right bags and containers is key to successfully sealing liquids without mess or spoilage. Look for high-quality, FDA-approved vacuum bags designed for liquids—these prevent leaks and maintain freshness. Hard containers with tight-sealing lids are also excellent, especially for larger quantities. Consider bags that support flavor infusion, allowing your liquids to retain their taste and aroma longer. For color preservation, opt for opaque or tinted containers that block light, preventing discoloration over time. Also, check that the bags are BPA-free and sturdy enough to withstand the vacuum process. Using the proper containers not only keeps your liquids secure but also helps preserve their flavor and color, making your storage more efficient and your food taste better. Additionally, maintaining caregiver emotional health can enhance your overall kitchen experience and efficiency.
- Heavy-duty, leak-proof vacuum bags
- BPA-free, food-grade containers
- Opaque or tinted containers for color preservation
- Bags with reinforced seals for added security
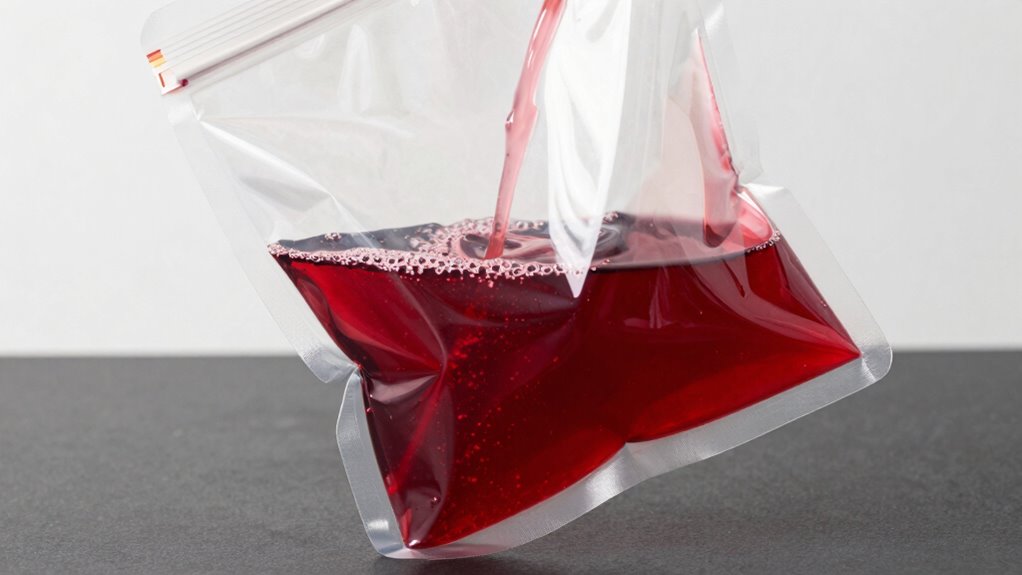
Common Mistakes That Cause Leaks When Sealing Liquids
One common mistake is filling bags improperly, which can cause leaks if you overfill or leave too much space. Always leave enough room for a proper seal and avoid overstuffing the bag. Additionally, skipping seal checks can lead to unnoticed gaps, so always double-check your seals before storing liquids. Ensuring that your sealing technique is adaptable will enhance the overall long-term adaptability of your vacuum-sealing process.
Improper Bag Filling Techniques
Filling vacuum seal bags improperly is a common mistake that often leads to leaks when sealing liquids. To avoid this, pay attention to the bag material and how much liquid you put inside. Overfilling leaves no room for the seal, increasing the risk of leaks. Also, rushing the sealing process by using too much sealing speed can prevent a proper seal, especially if the liquid is near the edge. Confirm the bag’s opening is clean and dry before sealing to improve adhesion. Using the right bag material, such as thicker, food-grade bags, also helps prevent punctures or tears. Proper filling technique involves leaving enough space at the top for a secure seal and working at a steady sealing speed to create an airtight closure.
- Overfilling the bag with liquid
- Not leaving enough headspace
- Using damaged or thin bag material
- Sealing too quickly without proper edge preparation
Inadequate Seal Checks
Have you double-checked your seal before storing liquids? Inadequate seal checks can compromise seal integrity and weaken container durability. Even a small gap or incomplete seal can lead to leaks, ruining your stored liquids and creating messes. Always inspect the seal carefully after vacuuming; look for uniformity and guarantee the bag or container is sealed completely across the entire edge. Don’t rely solely on visual cues—feel for any air pockets or gaps. If the seal isn’t secure, re-seal immediately to prevent leaks. Proper seal checks are vital for maintaining the integrity of your vacuum-sealed liquids and avoiding spoilage or messes caused by leaks. Taking a moment to verify your seal can save you time and frustration later.
How to Seal Thick or Viscous Liquids Effectively
Sealing thick or viscous liquids can be challenging because their density makes it difficult to create a proper vacuum without spills or leaks. To guarantee a secure seal, start by slightly freezing the liquid for about 30 minutes. This thickens it, making it easier to vacuum out without mess. Use a large, sturdy bag designed for liquids to prevent punctures. Always leave enough headspace to avoid overflow during sealing. For added flavor enhancement and shelf stability, double-check the seal and consider adding a layer of parchment paper or a cloth over the bag.
- Freeze the liquid briefly before sealing
- Use heavy-duty, liquid-safe bags
- Leave ample headspace
- Double-check the seal for security
How to Fix Leaks and Spills During Liquid Vacuum Sealing

When leaks or spills happen during vacuum sealing liquids, acting quickly can prevent messes and waste. First, stop the vacuum process immediately to avoid drawing more liquid into the machine. Carefully open the bag to assess the leak, then reseal it with a new, properly aligned seal. Using a slightly chilled liquid can help maintain flavor enhancement and prolong shelf life, so consider cooling the contents before resealing to reduce spillage risk. If a spill occurs on the sealing strip, clean it thoroughly to ensure a secure seal. For persistent leaks, double sealing or adding a layer of tape around the seal can help. Addressing leaks promptly keeps your vacuum-sealed liquids fresh, flavorful, and ready to maximize shelf life.
Safe Storage and Thawing of Vacuum-Sealed Liquids
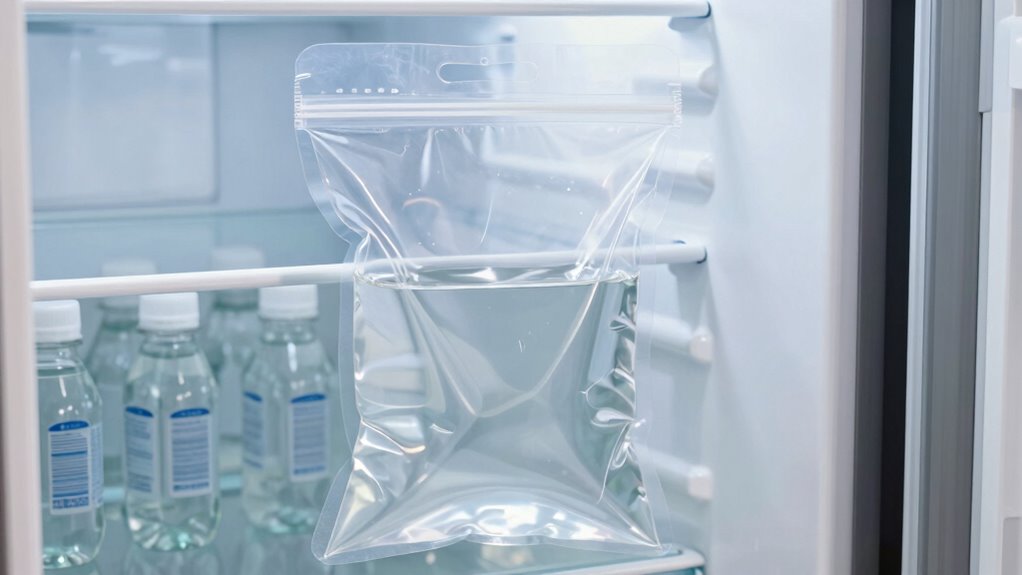
Proper storage and thawing practices are key to maintaining the quality and safety of vacuum-sealed liquids. Store your sealed liquids in the coldest part of your freezer to prevent spoilage, especially for flavor infusions and liquid concentrates. When thawing, do so slowly in the refrigerator to preserve flavor and texture. Avoid refreezing liquids once thawed, as this can compromise their quality. Label your packages with dates to track storage time. Proper thawing ensures even heat distribution and prevents bacterial growth. Keep an eye on leaks or damage to the seal, which can introduce contaminants.
Proper storage and slow thawing preserve flavor, texture, and safety of vacuum-sealed liquids.
- Store in the coldest freezer section
- Thaw gradually in the refrigerator
- Use within recommended storage times
- Check seals regularly
Creative Kitchen Uses for Vacuum Sealed Liquids
Vacuum-sealed liquids open up a world of creative possibilities in the kitchen, beyond traditional storage. You can use them to enhance your kitchen decor, creating attractive displays with colorful infused oils or broths in clear pouches. These seals also enable innovative cooking techniques like sous vide, where precise temperature control guarantees perfect results. You might freeze flavored stocks in fun shapes or layers, turning everyday ingredients into eye-catching additions to your meals. Vacuum-sealed liquids make it easy to store and access ingredients quickly, streamlining your prep work. By experimenting with different infusions and presentations, you add a personalized touch to your culinary space. Overall, vacuum sealing transforms liquids from simple storage items into versatile tools for creativity and style in your kitchen.
Frequently Asked Questions
Can You Vacuum Seal Carbonated or Fizzy Liquids?
You can vacuum seal carbonated or fizzy liquids, but you need special sealing techniques to preserve carbonation. Use a vacuum sealer with a gentle or pulse mode to avoid excessive pressure that could cause spills or loss of fizz. Make sure to leave some headspace and use a compatible bag designed for liquids. This way, you maintain carbonation preservation and prevent leaks, ensuring your fizzy drinks stay fresh longer.
How Long Can Vacuum-Sealed Liquids Be Stored Safely?
You can generally store vacuum-sealed liquids safely for up to 6 months, but it depends on factors like liquid freezing and container compatibility. When you vacuum seal, make certain your liquids are frozen to prevent spills and that your containers are sturdy and compatible with vacuum sealing. Regularly check for leaks or signs of spoilage, and always label with dates to keep track of storage time and maintain freshness.
Is There a Risk of Container Implosion When Sealing Liquids?
You might worry about container implosion when sealing liquids, but with durable containers and good seal integrity, the risk is minimal. Using sturdy, thick-walled containers helps prevent implosion caused by pressure differences. Guarantee the seal is tight and secure, especially when removing excess air, to maintain vacuum pressure. If you follow these precautions, sealing liquids safely becomes straightforward, and container failure is unlikely.
What Are the Best Practices for Labeling Vacuum-Sealed Liquids?
To guarantee proper storage labeling, you should prioritize labeling accuracy by clearly writing the contents, date sealed, and any relevant details directly on the vacuum-sealed bag or container. Use waterproof or permanent markers to prevent smudging. Place labels in a visible spot for easy identification. Proper storage labeling helps you track freshness and prevents mix-ups, making your vacuum-sealed liquids more organized and safe for long-term storage.
Can Vacuum Sealing Improve the Shelf Life of Homemade Broths?
Imagine saving your homemade broth, and it staying fresh for months—vacuum sealing makes this possible. It definitely improves shelf life by preventing freezer burn and spoilage. Plus, you preserve flavor and nutrient retention better than traditional methods. You’ll enjoy richer, more nutritious broths whenever you need them. Just make certain you seal carefully, label properly, and store at consistent temperatures to maximize freshness and taste.
Conclusion
Vacuum sealing liquids is like mastering a delicate dance—you learn the steps, trust the rhythm, and soon it becomes second nature. With the right tools and tips, you’ll keep your liquids fresh and spill-free, turning your kitchen into a well-choreographed performance. So, embrace this clean method, and let it be your secret partner in preserving flavors and saving space. Before long, sealing liquids will feel as natural as your favorite dance move.