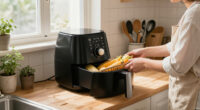
This guide helps you choose, place, and use an air fryer when counter and storage space are limited. It is for first-time buyers and anyone replacing a bulky appliance. You will measure your available space, match capacity to your meals, set up the fryer with room to vent, and cook a first batch. The steps take about 30-60 minutes before your first meal, plus cooking time. No special cooking experience is needed.

Get kitchen gear delivered free with Prime
- Fast, free delivery on millions of items
- Prime Video, Amazon Music and more included
- Member-only deals all year
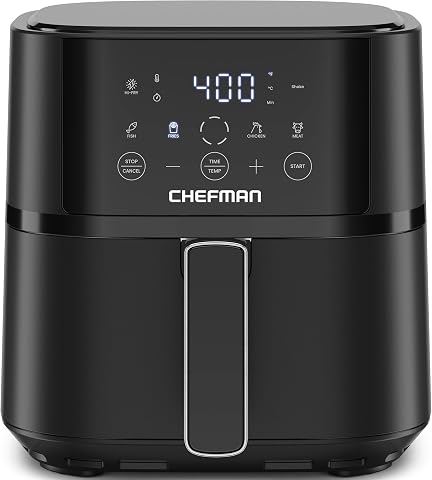
Chefman TurboFry Touch 4-Quart Air Fryer
- ✔ Capacity: 4 quarts
- ✔ Dimensions: 13.82 × 10.04 × 10.24 in (D × W × H)
- ✔ Weight: 7.5 lb

Chefman 2-Quart Digital Mini Air Fryer, Black
- ✔ Capacity: 2 quarts
- ✔ Dimensions: 10 × 10 × 8.3 in
- ✔ Weight: 5.9 lb

Cuisinart ClearView 4-Quart Glass Basket Air Fryer
- ✔ Capacity: 4 quarts
- ✔ Dimensions: 12.2 × 12.6 × 11.5 in (D × W × H)
- ✔ Basket material: Borosilicate glass
Difficulty: Beginner | Time: 30-60 minutes to choose and set up; 15-45 minutes per meal
What You’ll Need
Tools & Materials:
- Tape measure or ruler
- The air fryer’s product dimensions and manual, if you already own one
- A stable, heat-resistant counter or other approved surface
- Access to a grounded electrical outlet
Knowledge:
- Basic familiarity with your kitchen layout
- Ability to measure counter and cabinet space
- Basic safe handling of hot cookware
Check the appliance manual before placing or operating the fryer. Models differ in required ventilation clearance, voltage, cleaning instructions, and whether parts are dishwasher-safe. Do not assume that a compact model can operate inside a cabinet or beneath a low shelf.
Chefman TurboFry Touch 4-Quart Air Fryer
For a small kitchen that still needs to cook more than one modest serving, the TurboFry Touch 4-Quart is our best overall fit. Its four-quart capacity offers twice the listed room of the Chefman Mini, while its listed dimensions remain compact enough to make it worth considering for a limited counter. It is the more versatile of the two Chefmans when we want flexibility in batch size rather than the smallest possible appliance.The standout difference is Hi-Fry technology, which raises the temperature to 450°F for the final two minutes. That gives us a dedicated high-heat finish, while the Cuisinart reaches 450°F as an adjustable maximum and offers five cooking functions. The TurboFry keeps things more straightforward with four presets and touch controls. Its dishwasher-safe basket and rack also make routine cleanup less involved.There are limits to that balance. Four quarts may still constrain larger batches, and the lack of a viewing window means we need to open the basket to check progress. Choose the Cuisinart if visibility and more cooking modes matter more; choose the Mini if saving every bit of space matters more than cooking capacity. The TurboFry makes the most sense between those extremes.
Pros:
- Four-quart capacity provides more room than the two-quart Chefman Mini.
- Hi-Fry raises the temperature to 450°F for the final two minutes.
- Dishwasher-safe basket and rack ease cleanup.
- Automatic shutoff operates when cooking ends or the basket is removed.
Cons:
- Four-quart capacity can still limit larger batches.
- No viewing window for checking food without opening the basket.
Best for: Small households that want more than a solo-size basket and a simple countertop appliance with a crisping finish.
Not ideal for: Buyers who need large batches, want to watch food cook through a window, or prefer multiple cooking modes.
Bottom line: We recommend the TurboFry as the most balanced small-kitchen choice when we want useful capacity and a focused set of controls.
“We recommend the TurboFry as the most balanced small-kitchen choice when we want useful capacity and a focused set of controls.”
Chefman 2-Quart Digital Mini Air Fryer, Black
When countertop space is the binding constraint, the Chefman 2-Quart Mini is the easiest pick to justify. At 10 × 10 × 8.3 inches and 5.9 pounds, it has the smallest listed dimensions and lowest weight among these options. Its square basket is designed to make efficient use of that compact area, giving us a practical setup for one or two people without committing counter space to a four-quart cooker.Touch controls reach 400°F, and the shake reminder helps prompt us to move food during cooking. Automatic shutoff and a dishwasher-safe nonstick basket and rack keep routine operation familiar. Against the TurboFry, though, the Mini trades away half the capacity and the 450°F Hi-Fry finish. Compared with the Cuisinart, it lacks the glass viewing setup and broader cooking functions, but its smaller dimensions are the point.That tradeoff is decisive for households cooking small portions; it is a frustration for anyone who wants leftovers or regularly feeds more than two. The inner material also includes plastic, which may not suit buyers who prefer a less plastic-heavy construction. We’d pick it for an efficient solo setup, and skip it if a little extra counter room could accommodate a four-quart model.
Pros:
- Smallest listed dimensions among these three models.
- Square two-quart basket uses its compact cooking area efficiently.
- Shake reminder and automatic shutoff support convenient operation.
- Dishwasher-safe basket and rack simplify cleanup.
Cons:
- Two-quart capacity is limited to small portions for one or two people.
- Uses plastic as part of its inner construction.
Best for: One-person households or couples with very limited counter space who usually cook small portions.
Not ideal for: Families, meal preppers, or anyone who wants to cook larger batches or have leftovers.
Bottom line: We’d choose the Mini when minimizing the appliance footprint matters more than having room for larger portions.
“We’d choose the Mini when minimizing the appliance footprint matters more than having room for larger portions.”
Cuisinart ClearView 4-Quart Glass Basket Air Fryer
The Cuisinart ClearView is the small-kitchen choice for people who value monitoring and cooking flexibility more than the simplest design. Like the TurboFry, it has a four-quart capacity, but its glass basket, viewing window, and interior light let us check food as it cooks. That can help us avoid opening the basket just to inspect progress, a distinction neither Chefman offers.Its five functions—Air Fry, Bake, Broil, Recrisp, and Keep Warm—make the Cuisinart more adaptable than the TurboFry’s four presets and the Mini’s touch-control basics. Temperature adjusts in five-degree increments up to 450°F, and two custom presets let us save preferred settings. The dishwasher-safe, PFAS-free glass basket and crisper plate may also appeal to buyers who want a transparent cooking vessel that can serve beyond the appliance.Those additions come with practical compromises. The glass basket may be heavier to lift than a conventional basket, and its four-quart capacity still does not solve large-batch cooking. Its listed dimensions are also larger than the Mini’s, so we should measure the available counter before choosing it. If visibility and extra functions are worth the added handling, it has a clear case; if compactness is the priority, the Mini is a better match, while the TurboFry is the simpler four-quart alternative.
Pros:
- Glass basket, viewing window, and interior light make it easier to monitor cooking.
- Five cooking functions cover more tasks than the Chefman models’ stated controls.
- Dishwasher-safe glass basket and crisper plate are listed as PFAS-free.
- Two custom presets and five-degree temperature increments provide more control.
Cons:
- Glass basket may be heavier to handle than a conventional basket.
- Four-quart capacity may still restrict larger batches.
Best for: Small households that want a four-quart capacity, visibility while cooking, and more than one cooking mode.
Not ideal for: Buyers who prioritize the smallest and lightest unit, need large batches, or would find a heavier glass basket awkward.
Bottom line: We’d choose the ClearView when watching food cook and having multiple functions matter more than minimum size or light handling.
“We’d choose the ClearView when watching food cook and having multiple functions matter more than minimum size or light handling.”
As an Amazon Associate we earn from qualifying purchases.
Before You Start
Decide where the air fryer will operate before you buy it. Measure the usable counter area, including the room needed to pull out its basket or open its door. Check the height beneath shelves and cabinets, and leave the ventilation clearance specified by the manufacturer. If you plan to store the fryer between uses, measure the cabinet opening and the path you will carry it through. Avoid buying based on the appliance’s headline capacity alone: shape, basket width, and exterior size affect how well it fits your kitchen.
Air fryers heat and move hot air. Keep the exhaust away from walls, curtains, paper, and other heat-sensitive items. Do not place the appliance on a stovetop or use it where water can splash onto it. If your kitchen has no suitable operating location, choose another cooking method or plan a safe place to use the fryer.
Step-by-Step Instructions
Step 1: Measure the operating and storage spaces
Measure the counter area where the fryer will run: width, depth, and height to the nearest shelf or cabinet. Add the clearance stated in the product manual, and check that the basket or door can open fully without hitting a wall or another appliance. If you will store the fryer, measure the cabinet opening, shelf depth, and route from storage to counter. Write these measurements down so you can compare them with product specifications.
Tip: Measure the appliance’s full exterior dimensions, including its handle and any rear exhaust area. A fryer can fit on a shelf but still be awkward to place or remove.
Check: You have written down a usable operating footprint and, if needed, a separate storage space that can accommodate the appliance.
Step 2: Choose a size for your usual meals
List the meals you expect to cook most often and the number of people you usually serve. Compare that need with the manufacturer’s capacity guidance and the basket’s usable cooking area. A small basket may suit one person or side dishes, while larger portions often need a wider or deeper basket, a second batch, or a different appliance. Check the dimensions before buying; two models with similar stated capacity can take up different amounts of counter space.
Consider whether a single basket is enough. A dual-basket model can cook two foods separately, but it usually takes more width and may be harder to store. An oven-style model may offer shelves or trays, but its door swing and height can be inconvenient under cabinets. Pick the smallest design that can handle your routine portions without routinely stacking food too tightly.
Tip: If you regularly cook for several people, account for the time and energy of making multiple batches before choosing the smallest model.
Check: Your chosen model suits your typical portion size, and its listed dimensions fit the measured operating and storage spaces.
Step 3: Check the practical features before buying
Compare the details that affect everyday use: basket and drawer shape, removable parts, cleaning instructions, control layout, noise information, cord length, and warranty. Confirm that the outlet is in a sensible position and that the cord can reach it without crossing a walkway or sitting near a hot surface. Read the manual or product specifications for power requirements and ventilation clearance. Check whether the parts that contact food can be removed and washed easily.
Choose controls you can read and operate comfortably. Digital presets can be convenient, but they do not replace checking food for doneness. A simple dial model can take less time to learn. Prioritize a manageable footprint, useful capacity, and straightforward cleaning over features you are unlikely to use.
Tip: Do not rely on a product photo to judge scale. Use the listed dimensions or a store display, and compare them with your measurements.
Check: You can explain why the model fits your space, serves your usual meals, and works with your available outlet and cleaning routine.
Step 4: Set up the fryer on a clear surface
Place the appliance on a level, stable, heat-resistant counter with the clearances specified in its manual. Keep the exhaust outlet open and direct hot air away from walls, cabinets, curtains, and items that could melt. Make sure the basket or door can open fully. Plug the fryer directly into an outlet that meets the manual’s requirements; do not use an extension cord unless the manufacturer specifically permits it.
Remove packaging, stickers, and protective film as directed. Wash the basket and tray according to the manual, dry them fully, and reinstall them. Follow the manufacturer’s instructions for any first-use heating or odor-removal cycle. Keep the manual where you can find its cleaning, temperature, and safety guidance.
Tip: Do not run the fryer in a closed cabinet or push it against a wall to save space while it is operating.
Check: The fryer stands level, has the required ventilation room, opens without obstruction, and is connected as directed.
Step 5: Prepare a first batch with room for airflow
Choose a familiar food with a cooking time and temperature supported by the manual or a reliable recipe. Pat wet foods dry, cut pieces to a similar size, and add only a light coating of oil when the recipe calls for it. Arrange food in a single layer when possible, leaving gaps so hot air can circulate. If the basket is crowded, cook in batches rather than piling food above the recommended fill level.
Set the temperature and time from the recipe or appliance guidance. Treat preset programs as starting points, since food size, starting temperature, and model design can change cooking time. Place the basket or tray fully into the appliance before starting it.
Tip: Avoid pouring loose batter or excess oil into the basket. Follow the manual’s guidance for foods that drip or release fat.
Check: Food is arranged without blocking airflow, and you have a recipe or appliance setting to guide the first cook.
Step 6: Check, turn, and finish the food
Stay nearby during the first cook so you can learn how quickly your model cooks. When the recipe calls for it, pause the fryer and shake the basket or turn the food using suitable utensils. Open the basket carefully, keeping your face and hands clear of escaping steam. Check the thickest pieces for the recipe’s doneness cues; use a food thermometer for meat and other foods that require a safe internal temperature.
If the food needs more time, return the basket and cook in short increments, checking again. For uneven browning, reduce the amount in the next batch or turn the pieces more consistently. Remove finished food with heat-safe utensils and place it on a suitable plate. The basket and interior remain hot after the cycle ends.
Tip: Do not assume that a timer beep means the food is fully cooked. Confirm doneness using the recipe’s visual cues or a thermometer.
Check: The food is cooked through, browned to your preference, and removed without touching hot surfaces.
Step 7: Clean and store the fryer safely
Switch the appliance off, unplug it, and let it cool fully before cleaning. Remove the basket and tray, then wash them as the manual directs. Wipe the interior and exterior with an appropriate damp cloth; do not immerse the main unit or pour water into its electrical parts. Avoid abrasive tools or cleaners that could damage nonstick surfaces. Dry removable parts before reassembling or storing them.
If the fryer will remain on the counter, leave it in a location where its cord and vents are not blocked. If you will store it, wait until all parts are cool and dry, then lift it with a secure grip. Do not wrap the cord tightly around a hot or damp appliance. Keep the basket and accessories together so the next setup is simple.
Tip: Clean grease and crumbs after use. Buildup can cause smoke and can make later cleaning harder.
Check: The fryer is unplugged, cool, clean, dry, and either positioned with clear vents or stored in a dry space.
Common Mistakes to Avoid
- Buying a model that fits the counter but cannot vent safely beneath a cabinet. — Check the manual’s clearance requirements and measure the full operating height before purchase. Choose another location if the required space is unavailable.
- Choosing a basket that is too small for regular meals. — Compare usable cooking area and typical portions, not capacity labels alone. Account for the time needed to cook repeated batches.
- Filling the basket too tightly. — Leave room for hot air to circulate. Cook in batches when food overlaps heavily or blocks the airflow.
- Putting the appliance away while it is still hot or damp. — Unplug it, let it cool fully, and dry the removable parts before storing.
Troubleshooting
Problem: The food cooks unevenly or stays soft.
Solution: Cook a smaller batch, spread the pieces out, and shake or turn them partway through if the recipe calls for it. Check that the basket is fully inserted and the vents are unobstructed.
Problem: The fryer smokes during cooking.
Solution: Stop the fryer if smoke is heavy, unplug it when safe, and let it cool. Check the manual and remove food residue or excess grease from the basket and tray. For fatty foods, follow the manufacturer’s instructions; do not add water unless the manual directs you to.
Problem: The appliance will not fit in its planned spot once the basket is open.
Solution: Move it to a measured surface with room for the door or drawer to extend. If no safe operating position is available, return or exchange it for a model that fits the actual space.
Problem: The food is browned outside but undercooked inside.
Solution: Use smaller, evenly sized pieces and lower the temperature slightly if the recipe supports it. Continue cooking in short intervals and check the thickest portion with a thermometer when appropriate.
What Success Looks Like
You have selected an air fryer whose full dimensions fit both its operating location and planned storage space. It runs on a stable surface with the manufacturer’s ventilation clearance, and the basket opens without obstruction. Your first batch cooks with space for airflow and reaches the recipe’s doneness cues. After cooking, the appliance is unplugged, cool, clean, and dry before storage or its next use.
Next Steps
Use the first few meals to learn how your model browns different foods, and record settings that work well. Clean crumbs and grease after each use, and inspect the cord, basket coating, and vents periodically. Recheck the manual before trying foods that drip, expand, or need a precise internal temperature. If you move the fryer, measure the new location and restore the specified ventilation space before operating it.
Frequently Asked Questions
What air fryer size works for a very small kitchen?
Choose by the space available and the portions you cook most often. A compact single-basket model can work well for one person or side dishes, while a household that needs larger meals may prefer a wider model or accept cooking in batches. Check exterior dimensions and basket area before relying on capacity labels.
Can I run an air fryer under a kitchen cabinet?
Only if the manufacturer’s required clearances can be met and the exhaust has an unobstructed path. Some models need substantial space above or behind them. Follow the manual, and do not operate the fryer inside a closed cabinet.
Can I store the air fryer in a cabinet after every use?
Yes, if the cabinet is dry and large enough, and you let the appliance cool fully first. Clean and dry removable parts before storing them. Lift the fryer securely, and keep its cord from tangling or pressing against sharp edges.
Do I need to preheat a small air fryer?
Follow the recipe and the appliance manual. Some foods cook well without preheating, while recipes may call for a preheated basket to improve browning. If the instructions do not specify, start with the recipe’s guidance and check the food early the first time.
Why does my air fryer need space around it?
The appliance draws in and exhausts hot air while cooking. Blocking vents can affect cooking and may expose nearby surfaces or objects to heat. Leave the clearance stated in the manual, even when counter space is limited.