
To carve thin nooks for extra storage and decor, start by sketching your design carefully and planning the size, depth, and placement. Use small chisels or rotary tools for precision, working slowly along the grain to prevent splintering. Deepen the recess gradually, adding decorative details after shaping. Smooth edges with fine sandpaper and apply finishes cautiously. If you keep exploring, you’ll discover more tips to craft perfect, functional, and beautiful carved niches.
Key Takeaways
- Sketch precise, symmetrical shapes for narrow alcoves, ensuring aesthetic balance and functional storage.
- Select small, delicate tools like gouges for controlled carving of thin nooks.
- Carve along the grain with incremental depth to prevent splintering and maintain smooth edges.
- Finish with fine sanding and light finishing to keep recesses clean and visually appealing.
- Incorporate decorative details and lips after shaping to enhance both storage utility and decor.

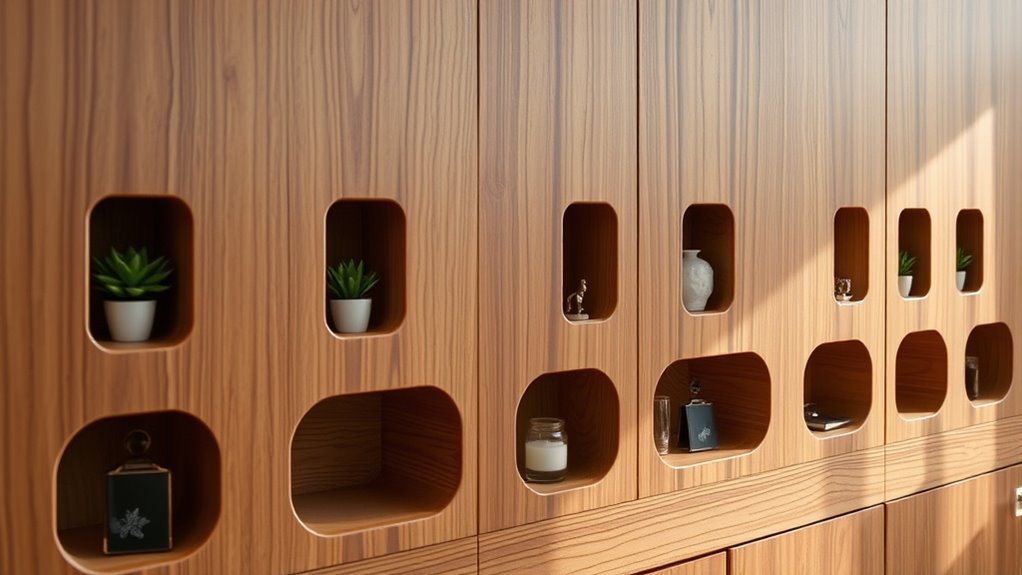
Have you ever wondered how to carve delicate, narrow nooks that add intricate detail to your woodworking projects? These tiny spaces, known as hidden alcoves or decorative recesses, can transform a simple piece into something truly special. Carving thin nooks requires precision and patience, but the effort pays off by creating functional storage and aesthetic accents. When designing these recesses, consider their purpose: are they for hiding small keepsakes, displaying collectibles, or simply adding visual interest? Knowing your goal helps determine the size, depth, and location of each nook.
Start by sketching your design carefully. Use a pencil to outline the exact shape of the hidden alcoves or decorative recesses you want to carve. Precision is key because these narrow spaces need to be symmetrical and proportionate to your overall project. Once you’re satisfied with your sketch, select the right tools—small chisels, gouges, or rotary tools work best for delicate work. A steady hand makes all the difference, so secure your project firmly and work slowly, removing small amounts of wood at a time. This careful approach prevents mistakes and ensures crisp, clean edges.
Carefully sketch your design for symmetrical, proportionate hidden alcoves before carving.
When carving thin nooks, pay attention to the grain direction. Carving against the grain can cause splintering or tearing, which ruins the fine detail you’re aiming to achieve. To avoid this, carve along the grain or at a slight angle, especially when creating the sides of the recesses. Deepening the alcoves gradually helps maintain control and prevents overcutting. If you’re adding decorative features within the recesses, like carvings or inlays, do so after establishing the basic shape. This allows you to focus on the overall form first, then add fine details later.
Finishing these small spaces is just as important as carving them. Sand the edges smoothly with fine-grit sandpaper to eliminate rough spots and splinters. For a polished look, you might apply a light stain or finish, but be careful to avoid filling the recesses with excess product. If you plan to use the alcoves for storage, consider adding a tiny lip or barrier at the opening to keep items from falling out. These small touches enhance both functionality and aesthetic appeal. Additionally, selecting materials that complement your overall design can elevate the visual harmony of your project, similar to how diverse designs can enhance indoor aesthetics.

CHEFMAN Multifunctional Digital Air Fryer+ Rotisserie, Dehydrator, Convection Oven, 17 Touch Screen Presets Fry, Roast, Dehydrate, Bake, XL 10L Family Size, Auto Shutoff, Large Easy-View Window, Black
Versatile countertop cooking: Air fry, bake, dehydrate, rotisserie, or roast to crispy perfection in one convenient appliance
As an affiliate, we earn on qualifying purchases.
Frequently Asked Questions
What Tools Are Best for Carving Thin Nooks Safely?
You’ll want precision tools like a fine chisel or a craft knife to carve thin nooks safely. Always wear safety equipment such as gloves and goggles to protect yourself from slips or debris. Keep your tools sharp for cleaner cuts and better control. Work slowly and carefully, applying steady pressure. This way, you minimize risks while achieving precise, neat carvings in tight spaces.
How Do I Prevent Damage to Surrounding Walls?
To prevent damage to surrounding walls, you should reinforce the wall with painter’s tape around the carving area, which adds a buffer and minimizes chipping. Use the right tools carefully to avoid knocking into the wall. After carving, check paint compatibility to guarantee the finish matches smoothly. Taking these steps helps protect your wall’s integrity and keeps the surface looking clean and professional.
Can Thin Nooks Be Added to Existing Furniture?
Yes, you can add thin nooks to existing furniture to create hidden compartments or decorative alcoves. While it might seem challenging, a skilled DIYer can carefully carve or modify pieces like cabinets or tables. Just make certain you plan your design and use proper tools to avoid damaging the furniture. Adding these small, functional features transforms your furniture into unique storage solutions and conversation starters.
What Materials Work Best for Durable Thin Nooks?
You should choose materials like hardwoods or high-quality plywood for durable thin nooks. Hardwood offers excellent durability and resistance to wear, making it ideal for long-term use, while plywood provides strength and stability at a lower cost. When comparing materials, consider durability factors such as moisture resistance, weight, and ease of maintenance. These choices guarantee your thin nooks stay sturdy and functional over time, even with regular use.
How Do I Seal and Finish the Carved Edges?
To seal and finish the carved edges, you should start with edge sealing using a suitable wood or drywall sealer to prevent moisture damage. Then, apply finish techniques like sanding smooth, followed by staining or painting to enhance appearance. For extra protection, consider sealing with a clear polyurethane or varnish. This approach guarantees your carved edges look polished and stay durable over time.

Furologee Kitchen Bakers Rack with Power Outlet, Microwave Oven Stand with Storage 4 Tiers, Coffee Bar Table with 6 S Hooks, Kitchen Storage Shelf Rack for Spices, Pots, Rustic Brown
[Baker's Rack with Power Outlets] Designed for the heart of your home, this kitchen storage bakers rack features...
As an affiliate, we earn on qualifying purchases.
Conclusion
So, next time you carve a tiny nook, remember—you’re not just creating storage; you’re crafting a masterpiece of clever clutter hiding. Who needs sleek, modern shelving when you can turn your walls into secret treasure troves? Just watch out—overdoing it might turn your home into a labyrinth of nooks, and suddenly, finding your keys becomes an epic quest. But hey, at least you’ll have enough hidden spots to stash everything from snacks to secrets!

CHEFMAN 2 Qt Mini Air Fryer – Digital Space-Saving Compact Air Fryer with Nonstick and Dishwasher Safe Basket, Quick & Easy Meals in Minutes, Features Digital Timer and Shake Reminder – Black
FAST AND EASY: This small air fryer comes prepared for any culinary challenge. The capacitive touch screen display...
As an affiliate, we earn on qualifying purchases.

Emeril Lagasse Extra Large French Door Air Fryer Toaster Oven Combo, 24 Cooking Functions and Digital Controls, 7 Accessories Included, Stainless Steel Finish, 26QT Capacity
A VERSATILE AIR FRYER AND MULTI-COOKER COMBO: Elevates practically any meal, from air frying quick after-school snacks to...
As an affiliate, we earn on qualifying purchases.