To make yogurt in an Instant Pot without failing, start with a quality starter containing live active cultures, like store-bought plain yogurt or a reliable yogurt starter. Heat the milk to 180°F to denature proteins, then cool it to around 110°F before adding the starter and mixing well. Set the Instant Pot to ferment at 110°F for 8 to 12 hours. Maintaining steady temperature and avoiding opening the lid is key—stay tuned to learn more tips for perfect results.
Key Takeaways
- Use a high-quality starter with live active cultures for reliable fermentation.
- Heat the milk to 180°F, then cool to 110°F before adding the starter.
- Mix the starter thoroughly into the cooled milk for uniform fermentation.
- Maintain a steady 110°F temperature during fermentation without opening the lid.
- Allow 8-12 hours for fermentation; longer yields tangier, thicker yogurt.

Have you ever wondered how to make fresh, creamy yogurt right in your own kitchen? It’s easier than you might think, especially when you have an Instant Pot. The key to successful homemade yogurt lies in understanding a few essential steps, starting with choosing the right starter culture. Your starter culture is what kickstarts the fermentation process, providing the beneficial bacteria needed to turn milk into yogurt. You can use store-bought plain yogurt with active cultures or a purchased yogurt starter. Whichever you choose, make sure it contains live active cultures; otherwise, your yogurt won’t set properly.
Once you’ve selected your starter, the next critical factor is maintaining the proper fermentation temperature. Achieving and sustaining the right temperature—around 110°F (43°C)—is crucial for ideal bacterial activity. If the temperature is too low, the bacteria won’t multiply enough, resulting in runny or bland yogurt. Too high, and you risk killing the beneficial bacteria, which ruins the fermentation process altogether. To keep the temperature steady, your Instant Pot’s yogurt setting is designed to maintain a consistent warmth, making it an excellent environment for fermentation.
Maintaining a steady 110°F ensures optimal bacterial activity for perfect homemade yogurt.
Begin by pouring fresh, high-quality milk into the Instant Pot’s inner pot. You can choose whole milk for creamier yogurt or lower-fat options if you prefer. Heat the milk until it reaches about 180°F (82°C)—this step helps denature the proteins, resulting in a smoother, creamier texture. Afterward, let the milk cool down to around 110°F (43°C), which is the crucial temperature for adding your starter culture. Once cooled, whisk in a small amount of your starter yogurt or powdered starter, ensuring it’s evenly distributed.
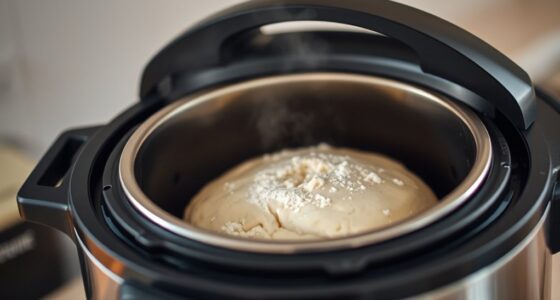
Now, close the lid of your Instant Pot and set it to the yogurt function. Most models allow you to specify the fermentation time, which can range from 8 to 12 hours depending on how tangy and thick you want your yogurt. During fermentation, the Instant Pot maintains that steady temperature, allowing the bacteria to ferment the milk and develop the signature tanginess. Avoid opening the lid during this process, as it can disrupt the temperature and interfere with fermentation.
After the set time, check your yogurt. It should be thickened and have a tangy aroma. Transfer it to containers and refrigerate for at least a few hours to let it firm up further. Remember, the longer you ferment, the tangier your yogurt will become. By paying close attention to your starter culture and keeping the fermentation temperature steady, you’ll consistently make delicious, homemade yogurt with minimal fuss.
Frequently Asked Questions
Can I Use Plant-Based Milk to Make Yogurt?
Yes, you can use plant-based alternatives like almond, soy, or coconut milk to make yogurt. Just keep in mind that the texture and flavor might differ slightly from dairy yogurt. Using plant-based milk lets you enjoy dairy-free options and offers great flavor customization. Make sure to choose a milk with added thickeners or add a bit of thickener yourself for a creamier texture, ensuring successful yogurt-making in your Instant Pot.
How Long Does Homemade Yogurt Last in the Fridge?
Your homemade yogurt typically lasts about 1 to 2 weeks in the fridge. If you’re using dairy alternatives, like almond or coconut milk, the shelf life remains similar, but always check for signs of spoilage. To keep it fresh, store your yogurt in an airtight container and follow proper storage tips. Remember, always smell and look at it before eating to verify it’s still good.
Do I Need a Yogurt Starter Culture?
You don’t necessarily need a yogurt starter or starter culture alternatives to make yogurt, but they make the process easier and more consistent. Using a yogurt starter provides beneficial bacteria essential for fermentation. If you don’t have one, you can use a small amount of store-bought plain yogurt with live cultures as a starter. This helps guarantee your homemade yogurt turns out creamy and tangy every time.
Is It Necessary to Sterilize the Instant Pot?
Think of your Instant Pot as a blank canvas for your yogurt masterpiece. While thorough instant pot cleaning helps prevent unwanted bacteria, sterilizing isn’t strictly necessary. Focus on using fresh yogurt starter options or store-bought cultures for reliable results. Keeping your cooker clean ensures a healthy environment, but a full sterilization is an extra step, like adding a splash of color to your art—nice, but not always indispensable for a perfect finish.
Can I Make Flavored or Sweetened Yogurt?
You can definitely make flavored or sweetened yogurt in your Instant Pot. Just prepare your basic yogurt first, then stir in your favorite flavor combinations like fruit purees, vanilla, or honey. For sweetener options, consider maple syrup, agave, or stevia. Mix them in thoroughly after incubation, and chill. This way, you customize your yogurt to suit your taste while enjoying a healthy, homemade treat.
Conclusion
Making homemade yogurt in your Instant Pot is easier than you think, and with a little patience, you’ll open a world of fresh, creamy goodness. Don’t worry if it takes a few tries—each batch gets better, like fine wine aging perfectly. Remember, your kitchen is your yogurt factory, and every swirl of your spoon is a step closer to mastering this art. Keep experimenting, and soon you’ll be creating yogurt so delicious, it’ll make your taste buds sing louder than a stadium full of fans!


